Sticker and label design
How to Make Curved Text for Stickers and Labels
Curved text works especially well on stickers and labels because the design already has a physical edge: a circle, an oval, a seal, a bottle label, or a die-cut shape. The goal is to make the lettering feel built into the sticker instead of pasted on top of it.
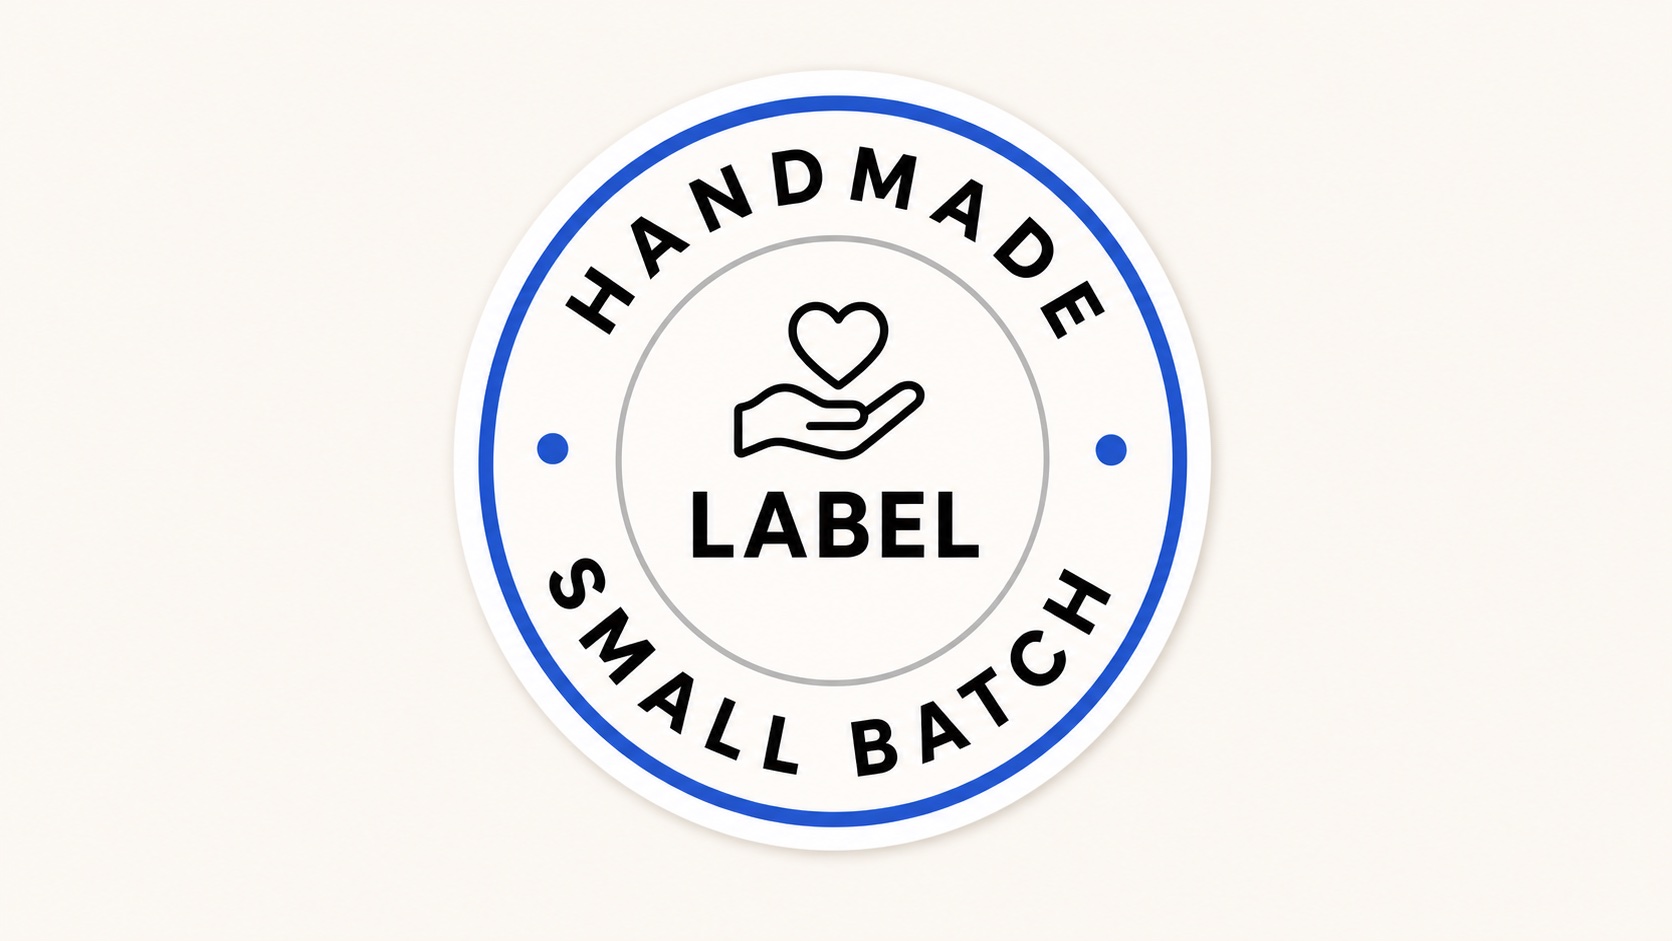
A round sticker reads best when curved text frames a short center mark.
Start with the sticker shape
Pick the shape before you tune the text. A round sticker usually wants top and bottom circular text. A rectangular label often works better with a gentle arc. An oval label can use curved text at the top while keeping the product name straight in the middle.
If you are starting from scratch, open our curve text generator and create the text on a transparent canvas. Keep the path visible while you adjust spacing, then hide the path before export.
Keep the words short
Stickers are often seen at small sizes, so curved text needs more breathing room than a normal headline. Short words, wide letter spacing, and bold fonts make the design easier to read after printing, cutting, or shrinking for a product mockup.
- Use two to four words on a top arc.
- Move secondary text to the bottom arc instead of forcing one long phrase around the circle.
- Avoid thin script fonts when the sticker will be printed small.
Use circle text for seals and badges
For round seals, split the design into layers: top curved text, center mark, and bottom curved text. This gives the sticker a finished badge structure and keeps the lower text from feeling upside down.
For a deeper walkthrough, use the circle text generator guide before you export the final sticker artwork.
Export the right file
Export SVG when the sticker will go into a vector workflow, cutting software, or another editor where you may need to resize and adjust the artwork. Export PNG when you need a finished transparent image for a mockup, product photo, listing image, or slide.
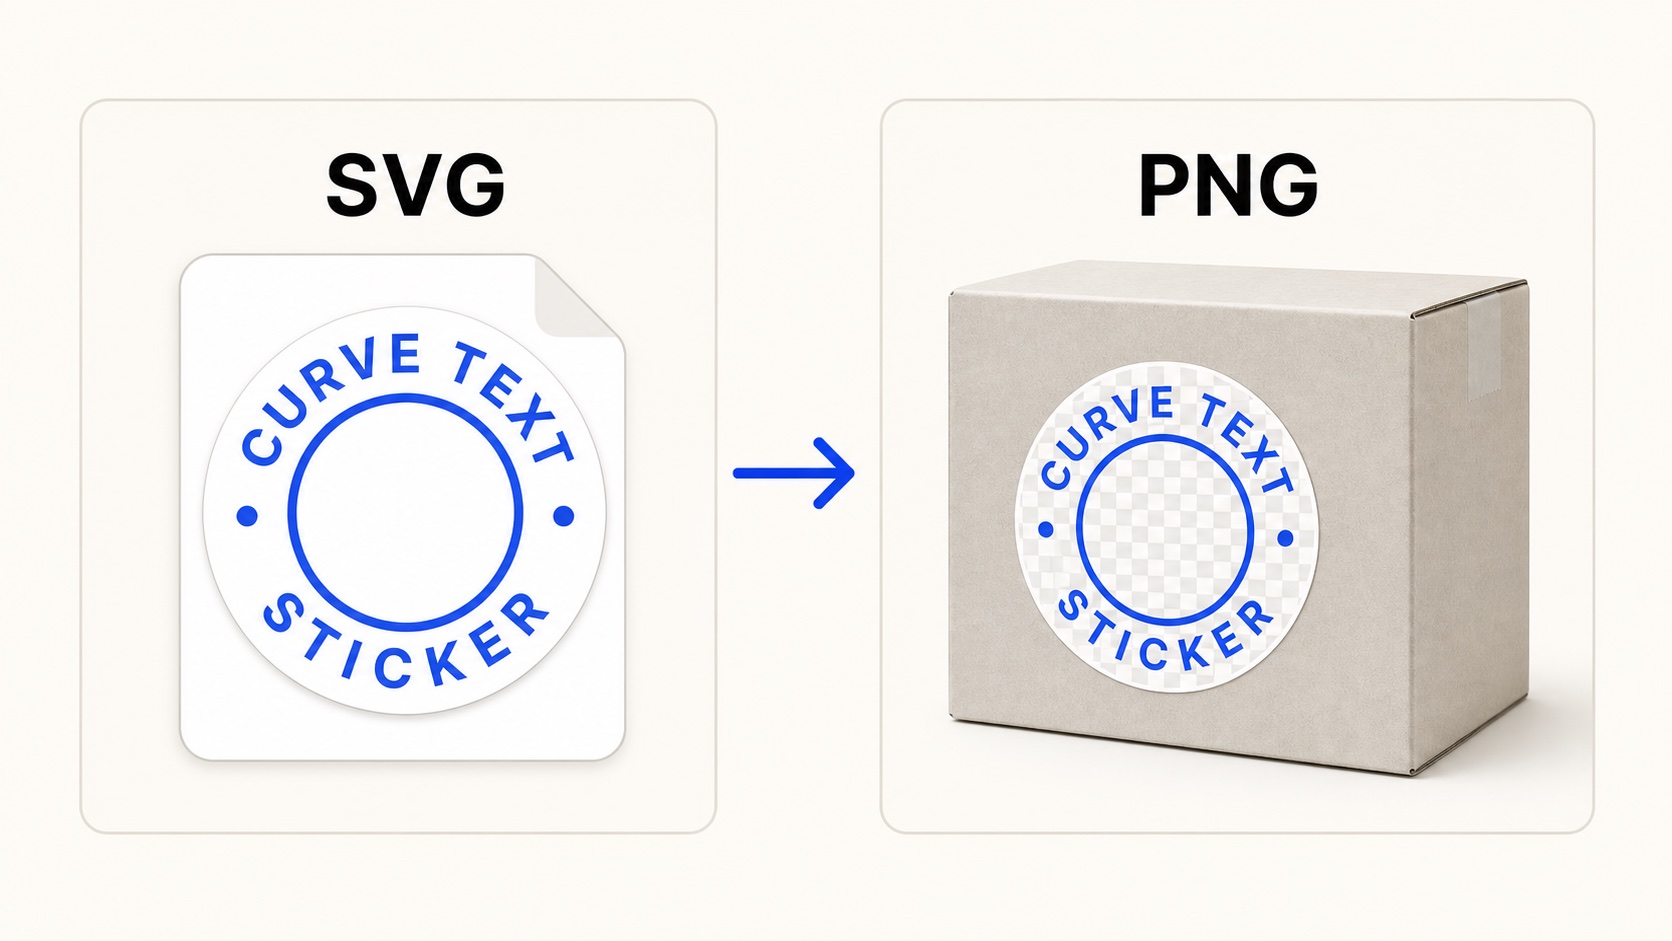
Use SVG as the editable master, then export PNG when you need a finished sticker preview.
Sticker design checklist
- Choose the sticker shape first.
- Keep curved text short and readable.
- Use bold fonts and enough letter spacing.
- Center the main word or icon inside the curve.
- Save SVG for editing and PNG for quick placement.
Practical workflow: make the curved text as a clean transparent asset, then place it onto the sticker, label, packaging mockup, or print layout in your main design tool.